
Building a practice room - Part 3
As Thanksgiving approached, the disaster that had been the downstairs of our house was finally taken care of and eventually all of our furniture was put back into place. As I took care of some of the finishing touches, I transitioned into Christmas-mode. Christmas is a big production in our house and we do a lot of decorating. And we do it early. With everything that had happened in 2020, including the issues in our house, I was looking forward to the warmth of the Christmas decor and some downtime from work.

“Exterior illumination” - Christmas 2020
After the holidays, the band scheduled a week-long getaway at the Oregon Coast to complete the mixing of our album. We had 14 songs to tackle so we had our work cut out for us if we were going to wrap things up in a week. We had planned for long days and nights so the tranquility of the beach would offer some peace and solace when we needed to clear our minds and give our ears a break from the fatigue that sets in from listening to music over and over again for long hours. Meanwhile, it was time to get back to work on my practice room.
I needed to find a way to handle ventilation (breathing is important) while not letting too much sound escape. I took to YouTube again to do some research on the best way to achieve this. I discovered that almost everyone was using the same idea with slight variations: a channeled baffle box design. The idea is to build a box with baffles that create a snaking channel between both holes. This means that when the sound tries to leave the room through the vent hole, it has to keep hitting a series of baffles as it makes its way out to the outer hole where the fan is. As the sound hits each baffle, it loses energy and eventually dissipates once it reaches the outer hole.

Example of a baffle box ventilation system
I created two boxes - one for the air intake that would be down low on the wall across from the garage window and the other for the exhaust that would sit on the roof of the room. After cutting the pieces for my boxes, I nailed and glued them together with the exception of the top piece. That would allow me to spray the inside with an adhesive and then line the box walls and baffles with 1” thick duct liner. The duct liner would act as insulation and also help to prevent mold and moisture build up since one side of the liner was smooth and coated with an anti-microbial layer. I mounted the vent pipe pieces and then covered the top of the boxes and sealed them with more of the Green Glue sealant. Then the boxes were put in place and the vent pipes were lined up with the holes I had cut into the wall and ceiling and the corresponding duct pipe. Next, I used some inline duct fans that I had purchased online. Both were rated for more than enough CFMs (cubic feet per minute) of airflow necessary for the size of the room. By the way, the way to calculate this is to determine the square footage of your room. For example, if you have a 10x10 room, that equals 100 square feet. That means you need a fan that is rated for at least 100 CFMs. The problem is that a lot of fans say they’re rated for a certain number but actually deliver a much smaller rate of air flow. You have to do your research and find the TRUE rating of your fan which can also be found online. Once the fans were mounted on the outside holes of the boxes, both boxes were sealed with two layers of 5/8” drywall - just like the rest of the structure. Remember, the structure is only as sound as the weakest point. If your entire structure is sealed in two layers of 5/8” drywall but your vent boxes have no drywall, well, the rest of your structure might as well not have any drywall either.

Intake ventilation box from the side where the fan will connect to push air through the box and into the room
The first week of February, the band and I headed to the coast to mix our album where we had rented a large house right on the beach. We spent the first 3 days on our own and then our wives joined us for the remainder of the week. We worked hard and put in some long hours each day. We didn’t quite finish all the songs but were able to get 12 done and that was something we could feel good about. The remaining 2 could be completed at home. While we were there, we enjoyed everyone’s company, good food, and some amazing views. We also celebrated this author’s 55th birthday! It was a nice way to work and we’ll likely make a similar trip for the mixing of our next album project.

The view from our control room while mixing at the beach
Once we were back home, I turned my attention to the practice room again - specifically, the flooring and door latches. For the floor, I used 3/4” thick rubber horse stall mats that I purchased from a local Wilco farm supply store. I selected 4 pieces that were EXTREMELY heavy and difficult to maneuver into place. Using a carpet knife, I cut the pieces to size and put them into place on the concrete floor. Fortunately, when I was installing the interior drywall, I had used a scrap piece mat underneath the lower piece of drywall around the perimeter of the room so that there was a nice 3/4” gap all the way around. So when it came time to put the horse stall mats down, they would fit snugly underneath the drywall up against the 2x4 boards.

3/4” rubber horse stall mats
Meanwhile outside, we were hit with the mother of all ice storms. Apparently we hadn’t dealt with enough challenges in 2020 and so Mother Nature decided to stick it to us again and cover all of our trees, plants, the roads, even our heat pump, which eventually prevented the blade from turning freely without it being thawed with hot water. At least I could still keep warm working inside. And while there was a lot of damage to some of our trees and plants, we were actually pretty lucky considering that many of our neighbors and friends had trees fall on their houses and cars.

Ice, ice, baby
For the door, I had decided on sealing the door snugly from the inside using some toggle latches and weather stripping around the perimeter of the door jam. Unfortunately, all the toggle latches that I could find, either in brick and mortar stores or online, were horizontal latches. I needed vertical latches to pull the door inward and tightly against the seals. And the only place they were available was through a company in England. Seriously? Yeah. So I had to wait quite a while for those to arrive while I experimented with the right size weather stripping to go around the door. Once the latches arrived, I installed 3 of them; one at the top, one at the bottom, and one in the middle. I had to experiment a little more with the weather stripping as the door didn’t have a uniform gap all the way around the jam. So it required varying strips of thickness at different points around the door. But eventually I was able to achieve an air-tight seal.

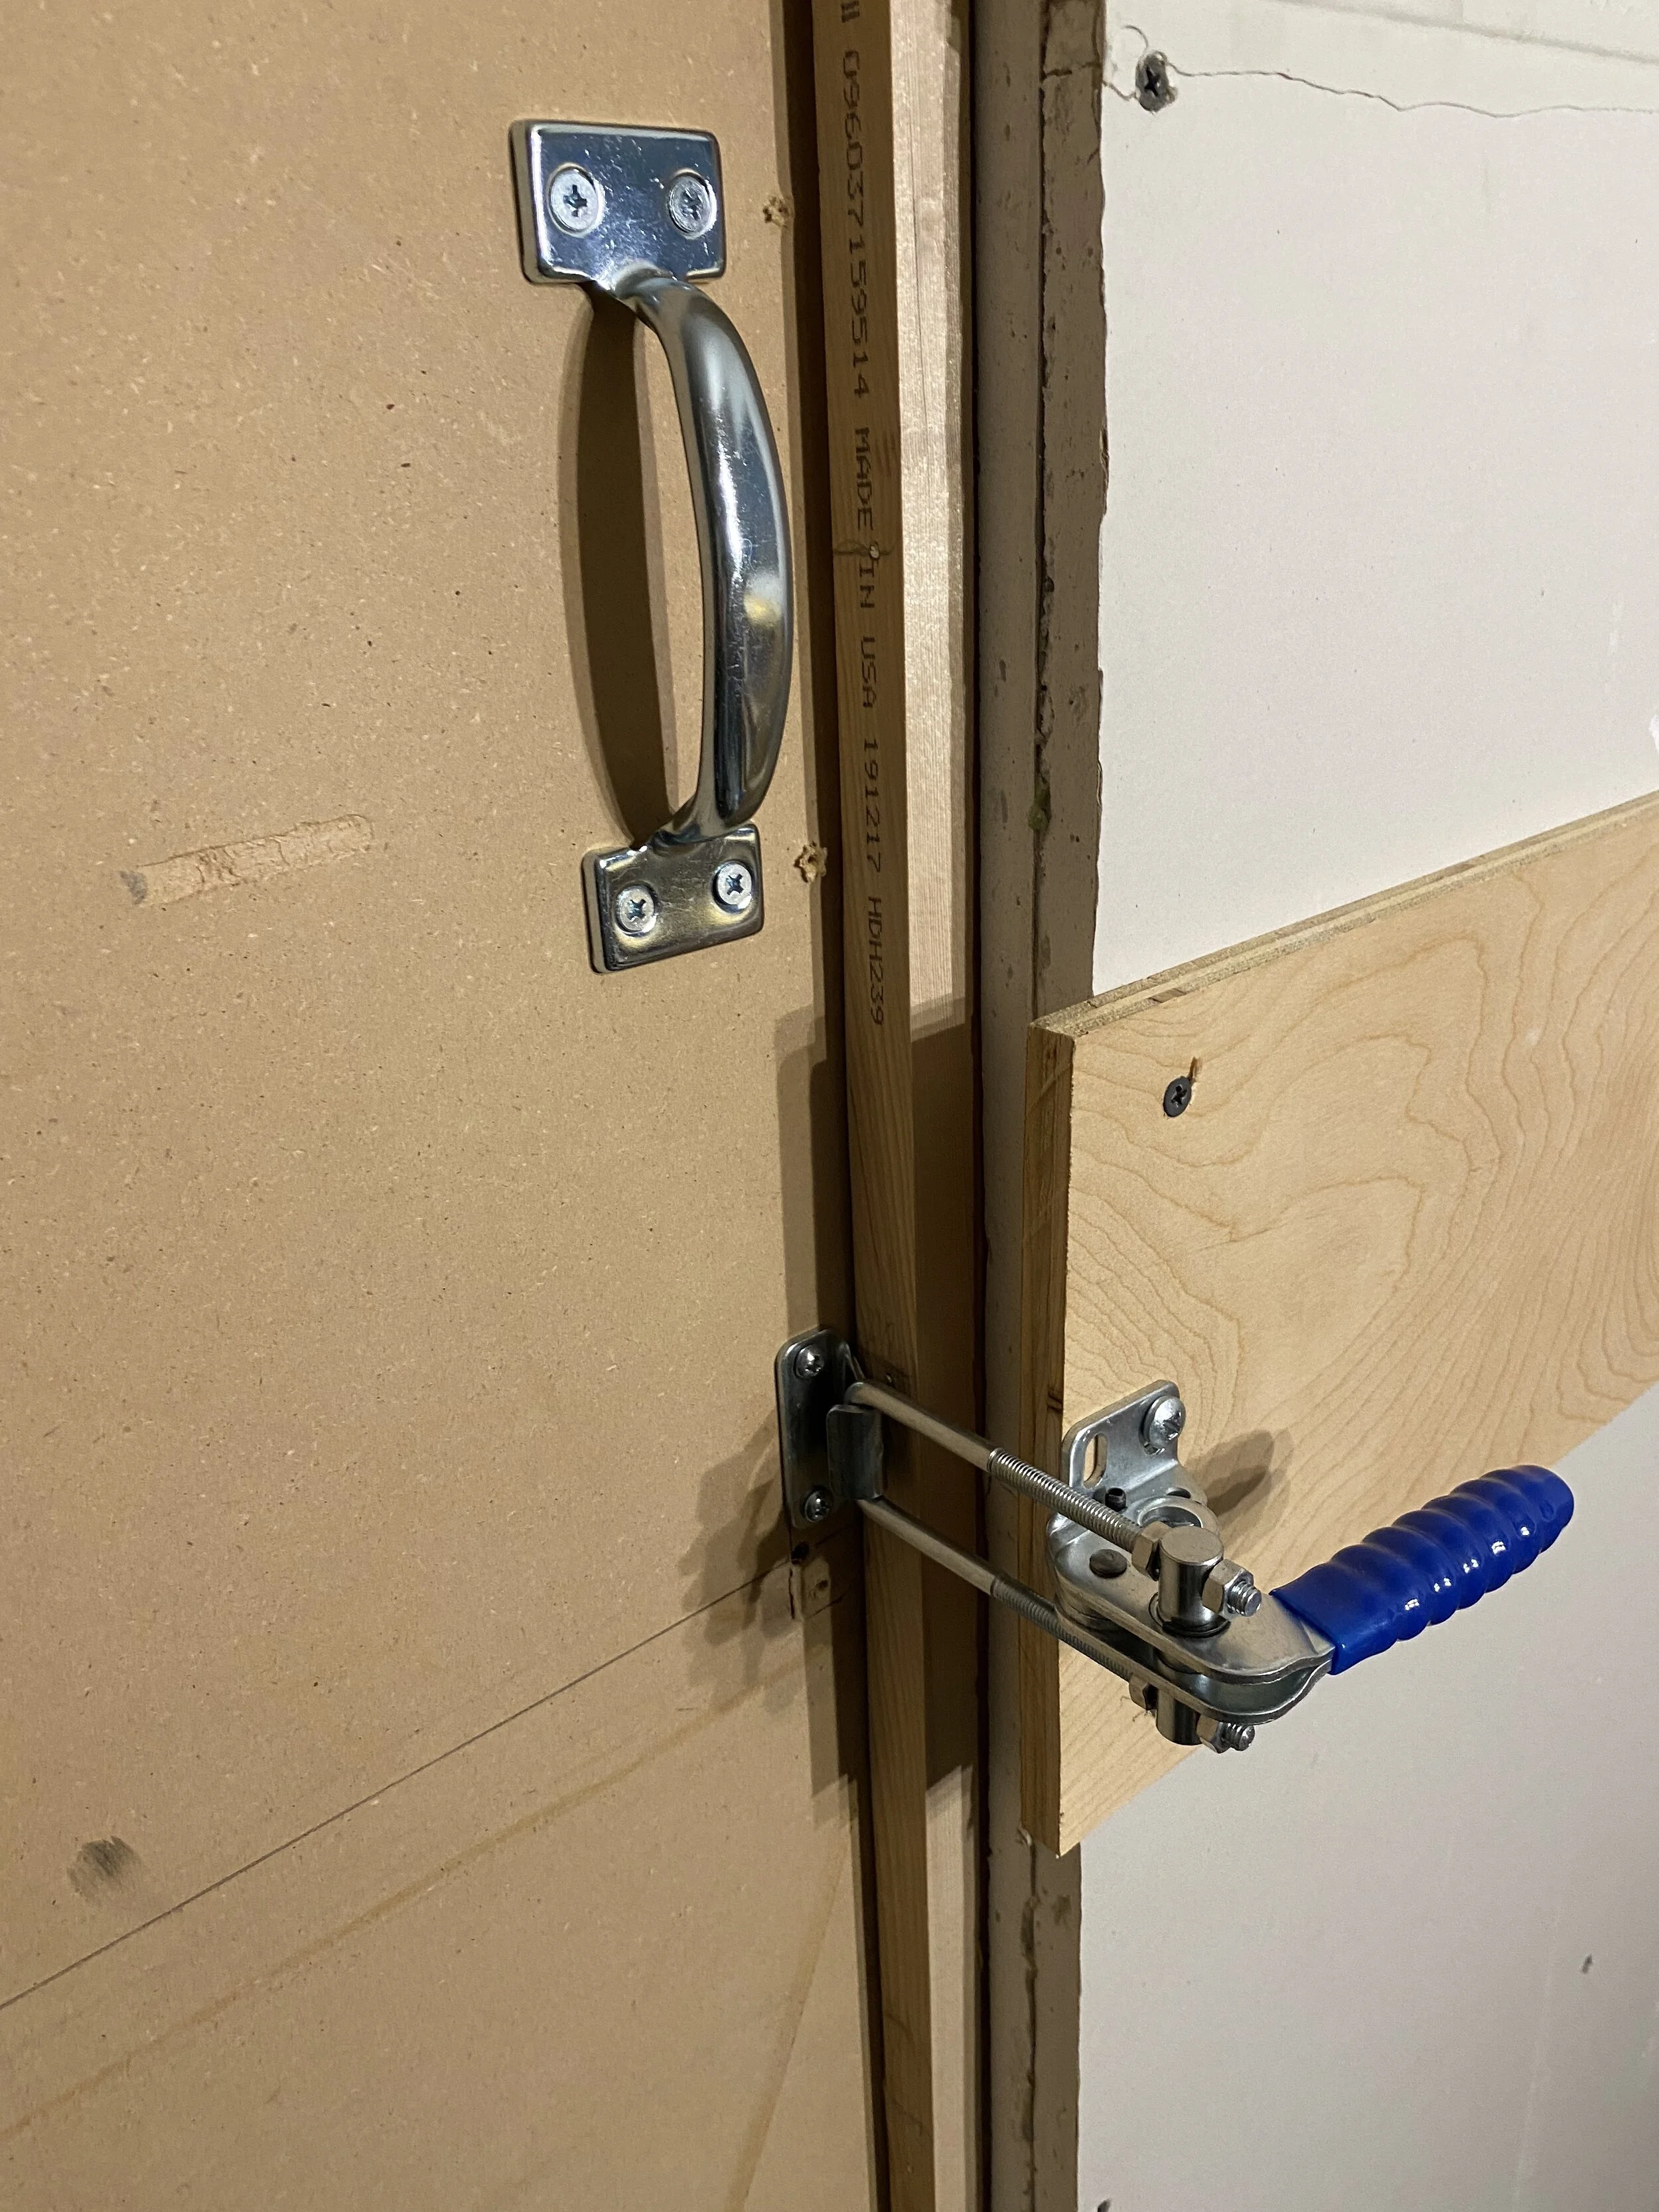
Vertical toggle latches
For lighting, I purchased LED light strips that were originally designed to be mounted on the underside of kitchen cabinets. I purchased two strips that met in the middle of the room and would plug into one of the power strips. I pealed away the adhesive backing and secured them in the corners where the walls met the ceilings. The strips came with a remote control that would allow me to turn the lights on and off as well as dim them to different degrees of brightness.
I began adding the extra touches like an old outdoor patio rug I had saved to put down underneath the drums and acoustical tiles on the walls and ceilings to help the acoustics within the room. The finishing touch was a bookshelf and TV monitor in the corner, along with an AppleTV puck, so that I could watch drum lessons from YouTube or the Drum Channel.
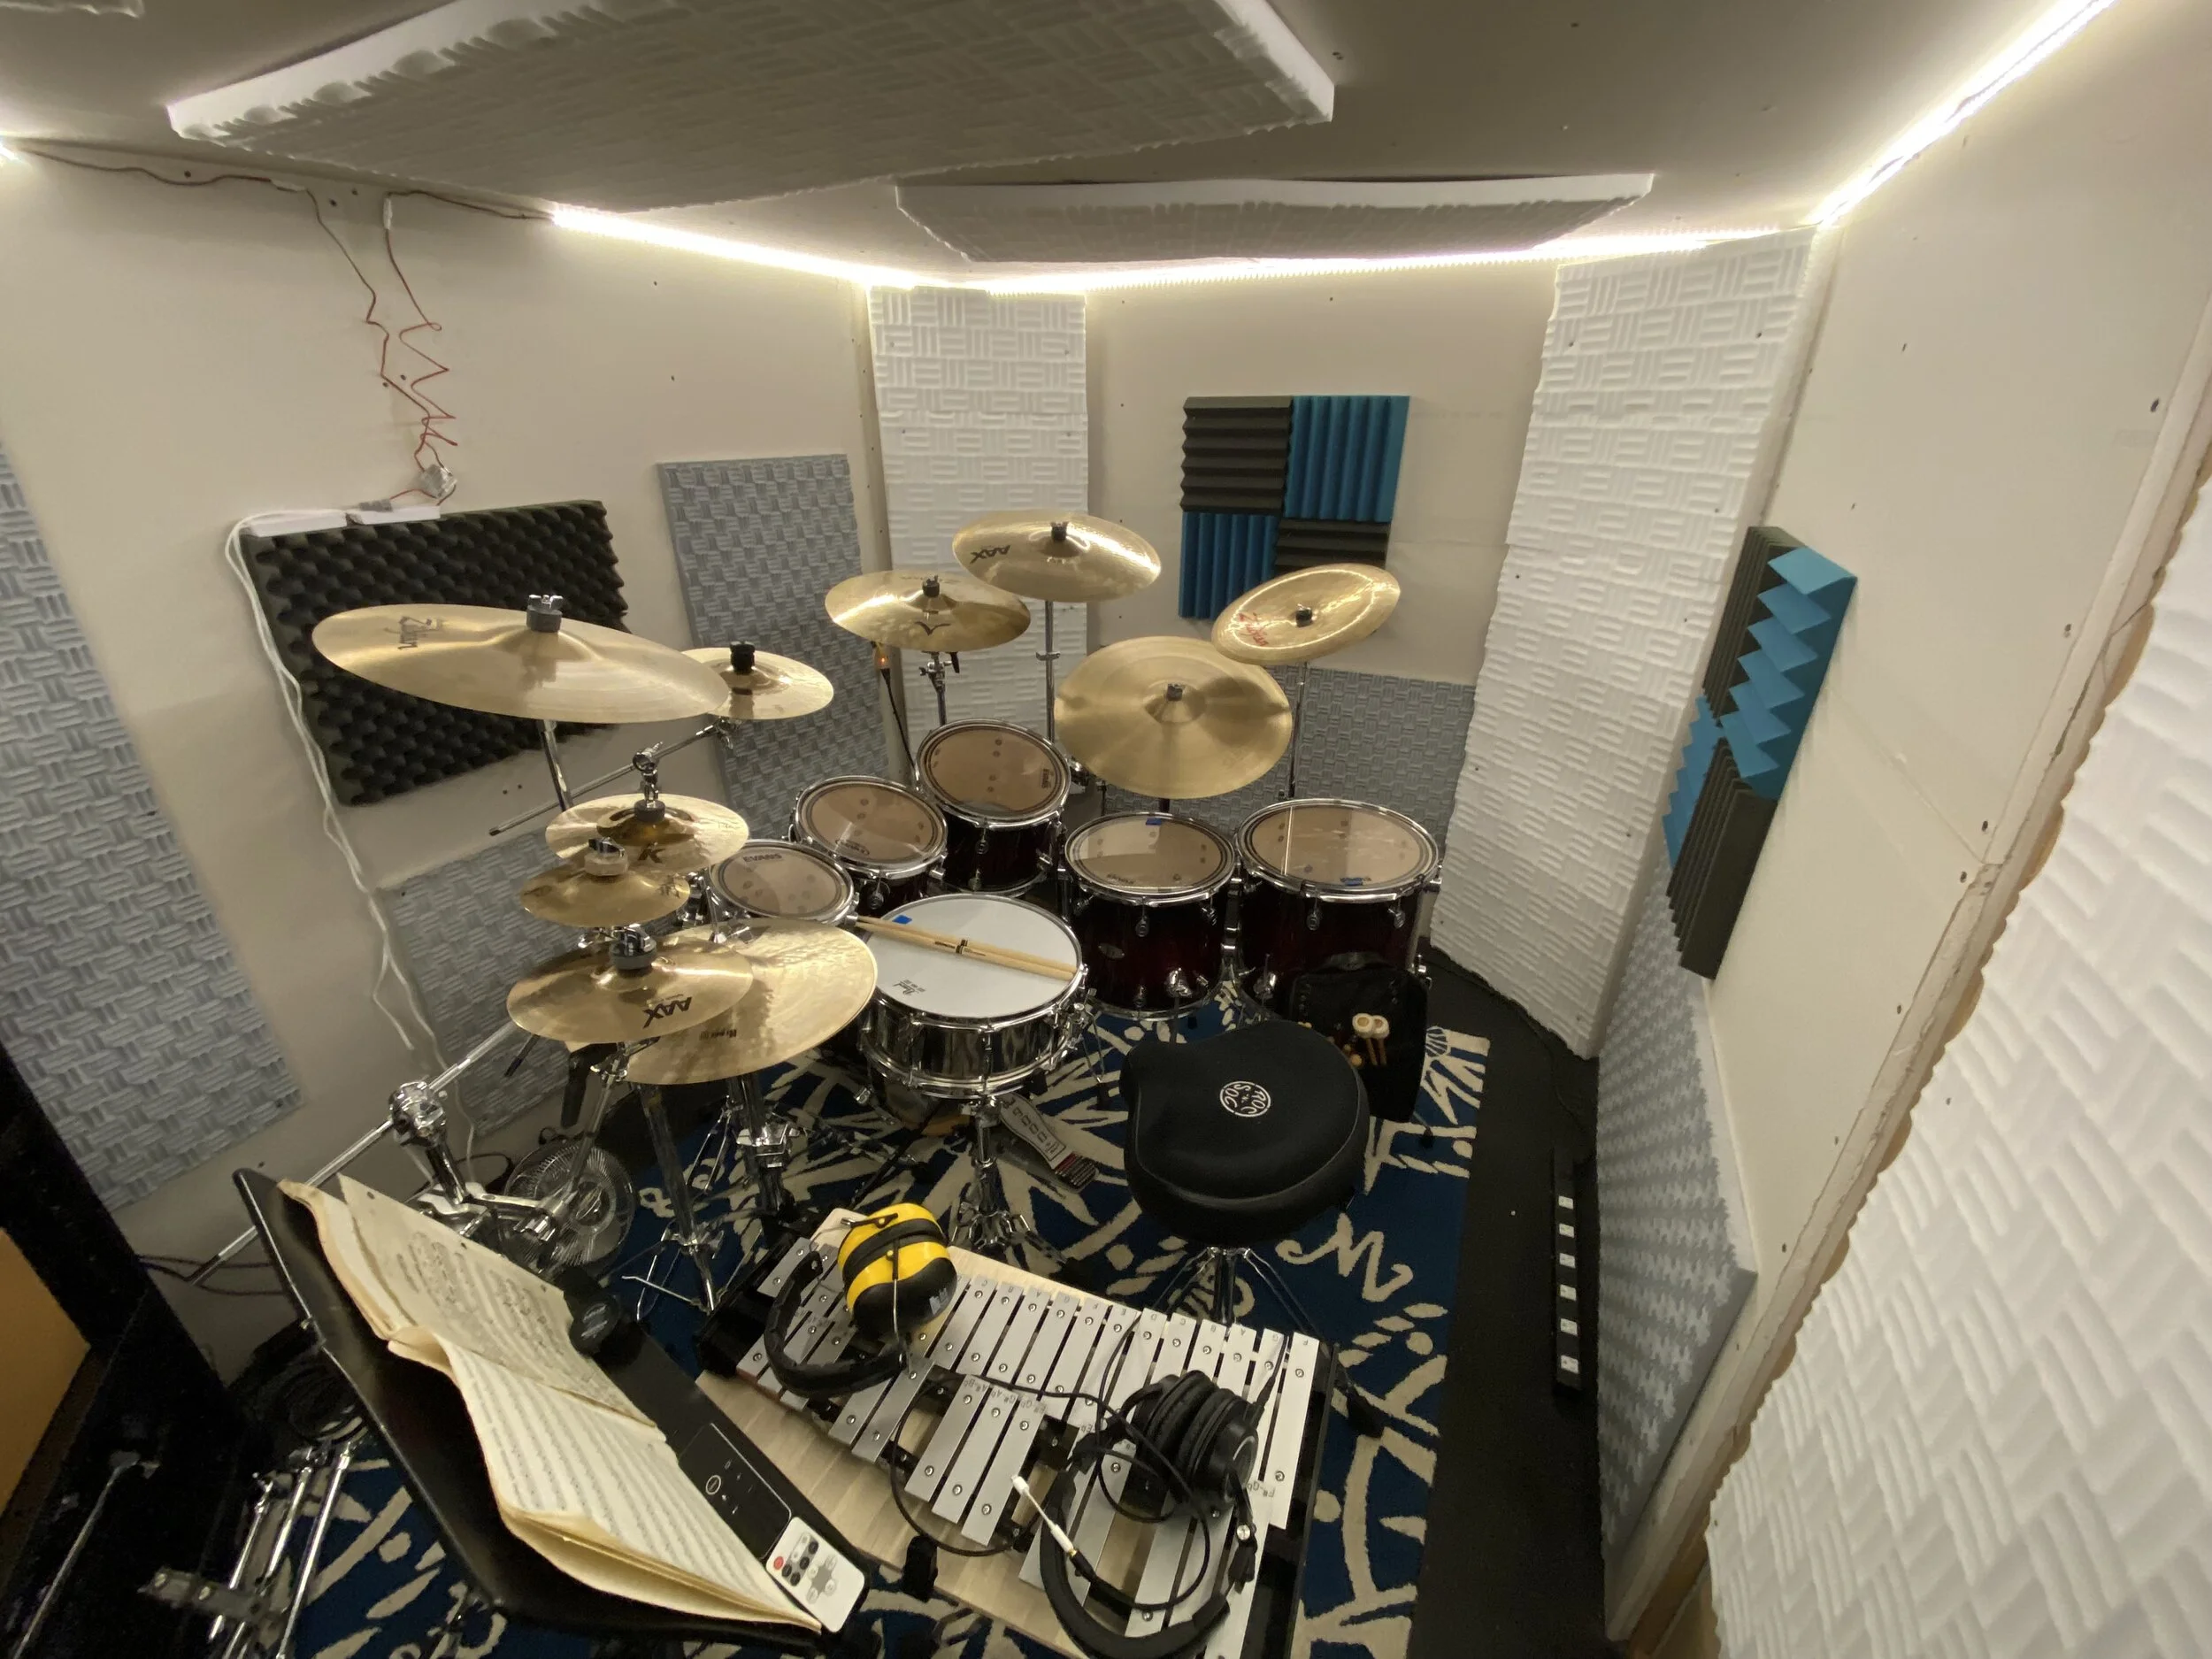
And finally, in late February, I was able to move my drum kit into the room and begin playing. It was only then that it finally felt like a practice room. The Beat Locker was open for business!

The Beat Locker
To test the efficacy of all my hard work and research, I shut myself in the room and played at my normal level (loud) while my wife took mental notes of the noise while standing in the garage, walking around all the different rooms inside the house and even walking around outside the house. She could hear me playing while standing in the garage and just outside the garage but it was severely muted. The same was true of her walk-in closet that sits on the second floor over the garage and with one corner directly over the practice room. But everywhere else in the house she couldn’t hear me. And the same was true outside the house with the exception of the side of the house where the garage window was or directly outside the garage doors. But again, it was muted and the sound of a car driving by was far louder. Mission accomplished!
A few months later I eventually added some bass traps for the corners of the room. I don’t completely understand why, but lower frequencies get “trapped” in the corners of rooms, especially rooms with 90 degree angles. You can hear this when you stand directly facing the corner of a room and speak in low tones. While doing this, take an object and put it between your face and the corner and you’ll hear the difference. So I rigged some poles on stands so they could sit in the corners and wrapped them with insulating materiel. Then I put 2 layers of foam acoustic tiles in front of those poles to further help deflect and absorb the low frequencies.
New and improved Beat Locker - now featuring bass traps
Looking back, I’m extremely proud of what I was able to do. This was certainly the largest structure I had ever attempted to build and for the most part, things wound up the way I had envisioned. Were there things that went wrong? Absolutely. There were plenty of times I felt overwhelmed and out of my element. But that’s when I would stop and figure things out. I’d take a break, acknowledge what I had done so far and research what needed to be done to fix the problem immediately in front of me. I also reminded myself how cool it was going to be when completed! There were a few things here and there that I might approach differently if I were doing it again but not many. And those things were only evident with the benefit of hindsight anyway.

Our album, “Loverture,” was released in mid-April and that represented another accomplishment I could be proud of. And after a rough 2020 combined with a gloomy beginning to the current year, it was good to feel good. Good to no longer focus on being a carpenter and instead focus on being a musician. Good to focus on being a drummer again, get my chops back, and enjoy the rewarding feeling of accomplishment in solving rhythmic puzzles. Now I can focus on rehearsing our album in the hopes of one day playing live again. I can also prepare my parts for our next batch of new music that we’ll record later this year. Which is how this whole project began in the first place! And that’s a good way to bring everything full circle and draw to a close. Or, depending on how you look at it, a new beginning.
